Create a Sync Job using the Wizard
To create a new job, click Create New Job at the top of the iPACS Sync application window. This will launch the iPACS Sync Job Wizard, which will guide you through the process of setting up a Sync job.

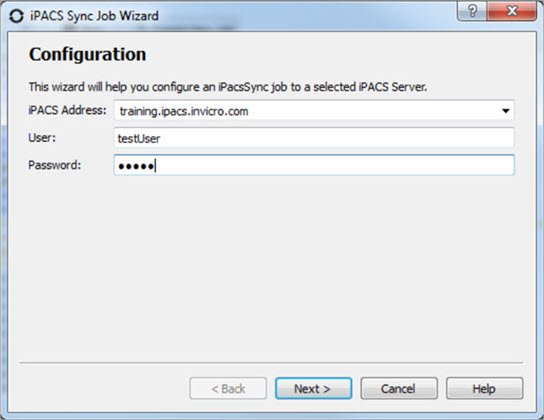
- Specify the iPACS URL or IP address in the iPACS Address field. Previously used addresses are available by clicking the arrow at the right of the text field.
- Enter the username and password to use for the Sync. Data transfers adhere to the roles associated with an iPACS user’s account.
-
After entering the required information, click Next.
- The wizard will attempt to download and install the sync key file for the specified iPACS. Alternatively, you can access the wizard via a web browser on the home admin page. The admin page is only available to users with the admin role.
- Once the Sync Key is installed, click Next.
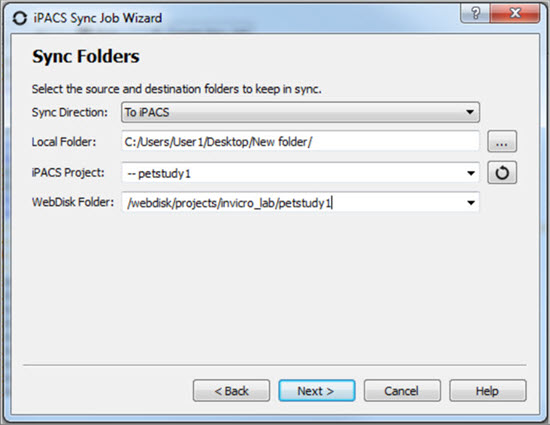
- Specify the direction of the Sync.
- Provide the complete path to the local directory to use in the Sync.
- Select the project on the iPACS to use for the Sync.
- The
 button will retrieve a list of projects on the iPACS, which can be selected by clicking the arrow to the right of the text field.
 - The path of the iPACS project can also be manually entered in the iPACS Project field.
- The
- The WebDisk folder for the selected project will automatically populate into the WebDisk Folder field. You can select subfolders via the drop-down menu to the right of the text field.
-
After entering the required information, click Next.
- A summary page shows all the selected settings for the new Sync job.
- Enter a name for the Sync job, then click Finish.
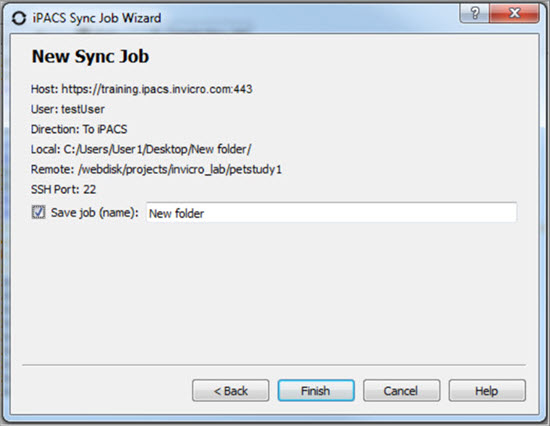
The Sync job is now created, and will be run immediately. Further settings can be configured, as described in the following sections.
Configuring Additional Settings
The iPACS Sync Config window allows you to manually create new Sync jobs and edit the configuration settings of existing jobs. To access the iPACS Sync Config window, click on the wrench icon ![]() on the left side of the main window.
on the left side of the main window.
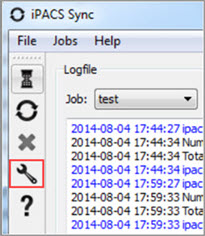
Select the job to configure from the Open drop-down, or enter a name and click Create to create a new Sync job.

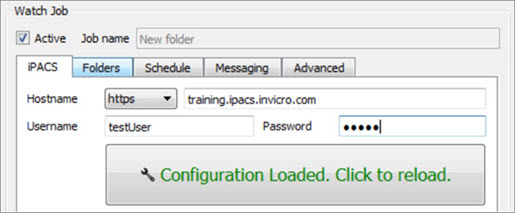
iPACS Setup
Make a job active or inactive. Specify the iPACS URL or IP address in the Hostname field. Data transfers adhere to the roles associated with an iPACS user’s account. If the Username and Password information are not provided here, the application will prompt for it before every data transfer iteration. Click the Configuration button to automatically obtain the sync key file from the iPACS if necessary.
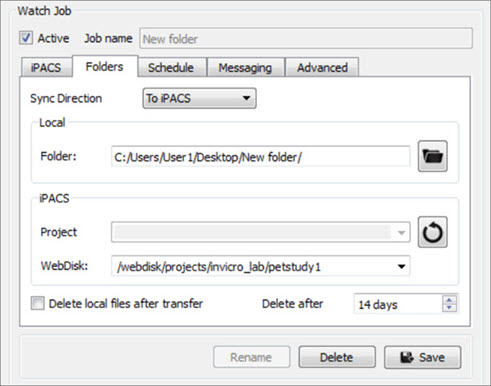
Directory Setup
Specify the direction of the Sync. Provide the complete path to the local directory to use in the Sync. Select the project on the iPACS to use for the Sync; the ![]() button will retrieve a list of projects on the iPACS, which can be selected by clicking the arrow to the right of the text field. The WebDisk folder for the selected project will automatically be entered into the WebDisk field. Subfolders can be selected by clicking the arrow to the right of the text field.
button will retrieve a list of projects on the iPACS, which can be selected by clicking the arrow to the right of the text field. The WebDisk folder for the selected project will automatically be entered into the WebDisk field. Subfolders can be selected by clicking the arrow to the right of the text field.
| Setting | Description |
| Delete local files after transfer | Files that were successfully transferred to the server are deleted locally. This feature is potentially dangerous and could lead to loss of data if not used properly. |
| Delete after | Schedule when files are removed from source location. |
Scheduler
Create a schedule for when a Sync job will run.

| Setting | Description |
| Scan interval | Specify how often a Sync job runs while the application is open. |
| Autosync changes | A Sync job will automatically start whenever a new folder is added to the top level folder. |
| Only during scheduled scan interval | A Sync job will automatically start at the time specified on the days selected. |
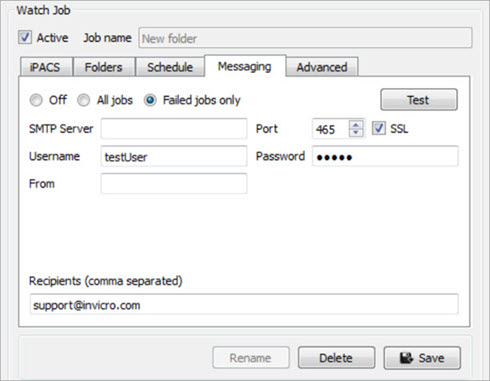
Notifications
| Setting | Description |
| Message Notifications | Turn on Message Notifications and specify what type of messages are sent. |
| SMTP Server | Contact your IT department for the server address. Normally can be found in the settings tab of your Email Client. |
| Port | Contact your IT department for the server address. Normally can be found in the settings tab of your Email Client. |
| Username | Username used associate with your email account. |
| Password | Authorization to access your email account. |
| From | Email account from which the notification will be sent. |
| Recipients | Notifications will be sent to the provided email addresses. |
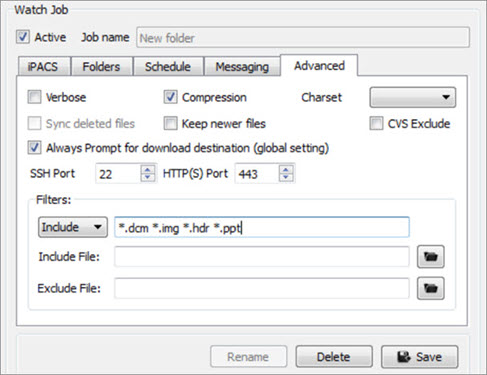
Advanced
Include or exclude files by specifying their extension. (e.g. *.dcm *.img *.hdr *.txt *.png). Filter is applied recursively through the subfolders of the top-level folder. The user can also provide files containing which file names, file extensions, and/or folders to include or exclude. Example text files would include the following:
Include:
+ 2009*/
+ *.csv
Exclude:
- *
In this example, all folders beginning with 2009 and all .csv files within those folders would be included in the transfer. All other files would be excluded.
| Setting | Description |
| Verbose | Print more detailed log messages. |
| Compression | Data is compressed before sending. |
| Filename charset | Specify as US-ACII, ISO-8859-1, UTF-8 or disable this feature. |
| Sync deleted files | Remove remote files that are no longer available locally. This feature is potential dangerous and could lead to loss of data if not used properly. |
| Keep newer files | Modified files at destination end will not be overwritten. |
| CVS Exclude | Ignore all version control hidden files (.svn folder) when restoring files via iPACS sync. |
| Always Prompt for download destination (global setting) | Prompt user to specify download destination for each file downloaded via iPACS sync from the iPACS. |
Store Job
Click Save at the bottom of the window to save any changes to the Sync configuration. Click Cancel to discard all changes since the last time the configuration was saved.
