Overview
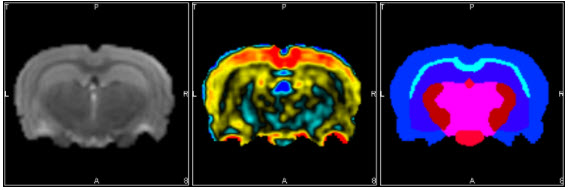
The fMRI Brain Atlas Segmentation Tool uses a species-specific atlas to evaluate functional or structural MRI, fMRI, or phMRI data. Several pre-processing and analysis options are available to enable accurate characterization of signal change for a variety of acquisition paradigms.
Install Atlas
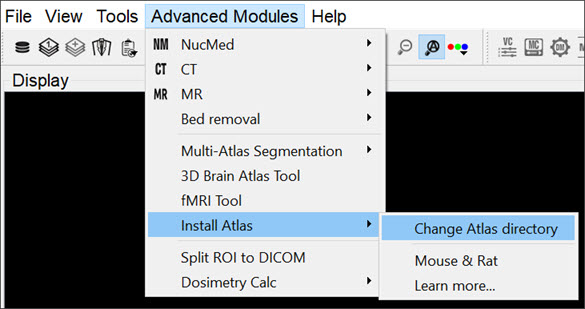
Before using the fMRI tool, download and install the available atlases by going to Advanced Modules -> Install Atlas -> Mouse & Rat. To change the directory where the atlases are automatically stored, go to Advanced Modules -> Install Atlas -> Change Atlas Directory and re-install the atlases to this location.
Getting There
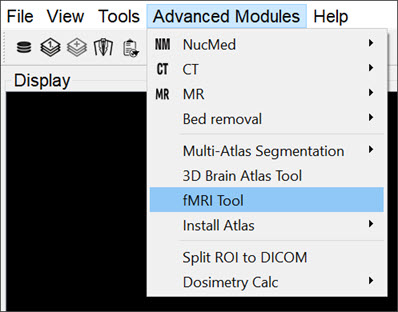
Access the fMRI Tool is by navigating to Advanced Modules -> fMRI Tool.
Load Data into the Tool
The Load Data section allows you to load a dataset from a local folder or import a dataset that is already loaded into the software. For Bruker MR data, you can select the 2dseq file from the appropriate folder or use the Bruker Loader to load the data into VivoQuant prior to running the tool.
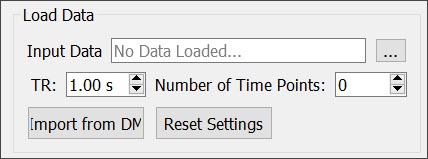
| Input Data | Displays the folder location and file name when a locally stored data set is loaded. |
| Click on the ellipsis button to locate and load a locally stored data set. | |
| TR | Enter the repetition time in seconds. You can either type the correct value or use the up and down arrows to adjust the TR. |
| Number of Time Points | The number of time points will automatically update upon loading a data set. |
| Import from DM | Click on this button to import data that has already been loaded into VQ. |
| Reset Settings | Click on this button to unload data from the tool and reset the pipeline settings back to the default settings. |
Select an Output Repository
The Output section allows you to select an output folder and manage the format and number of output files.
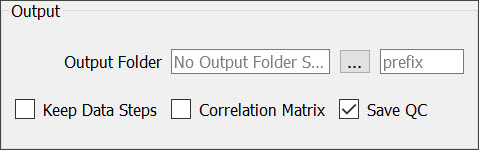
| Output Folder | Displays the output folder location once a local folder is selected. |
| Click on the ellipsis button to locate and select a local output folder. | |
| prefix | Provide a prefix (optional) to be added to all output file names. Adding a prefix is useful when performing multiple analyses that are saved to the same output folder. |
| Keep Data Steps | Check this box to save intermediate analysis results including the original data set. |
| Correlation Matrix | Check this box to save a region of interest correlation matrix spreadsheet. |
| Save QC | Check this box to save before and after motion correction, smoothing, anatomical registration, brain mask, and/or atlas registration QC movies and images. |
Customize Analysis Pipeline
The Pipeline section of the fMRI tool allows you to fully customize your data analysis workflow.
You can choose to enable or disable any of the following processing modules:
- Motion Correction
- Smoothing
- Anatomical Registration
- Brain Mask
- Atlas Registration
- General Linear Modeling
Depending on which processes are enabled, the analysis workflow will go in the order of the display tabs.
Motion Correction
Check the Enable box to perform a motion correction of the input data.
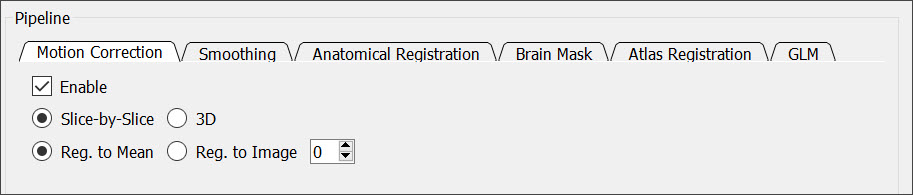
You can perform either a slice-by-slice or 3D motion correction. You can also choose to register each time point to a single time point or to the mean of all the time points.
If Keep Data Steps is checked in the Output section of the tool, then the motion corrected data will be stored to the output directory with suffix -mc. Similarly, if the Save QC box is checked, then before and after motion correction QC movies will be stored to the output directory.
Smoothing
Check the Enable box to smooth the input data.
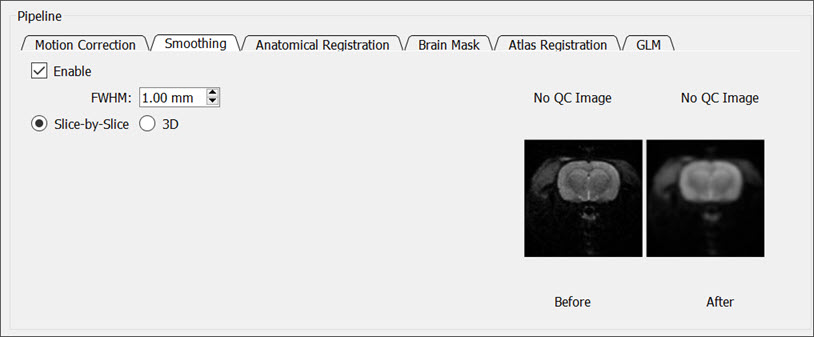
You can choose to perform either a slice-by-slice or 3D spatial smoothing. You can also edit the full width at half maximum (FWHM) setting to adjust the level of smoothing.
If Keep Data Steps is checked in the Output section of the tool, then the smoothed data will be stored to the output directory with suffix -sm. Similarly, if the Save QC box is checked, then before and after smoothing QC images will be stored to the output directory as well as displayed under the smoothing tab. The mean of the functional data set will be used for the QC images.
Anatomical Registration
Check the Enabled box to co-register the input data to an anatomical reference data set.
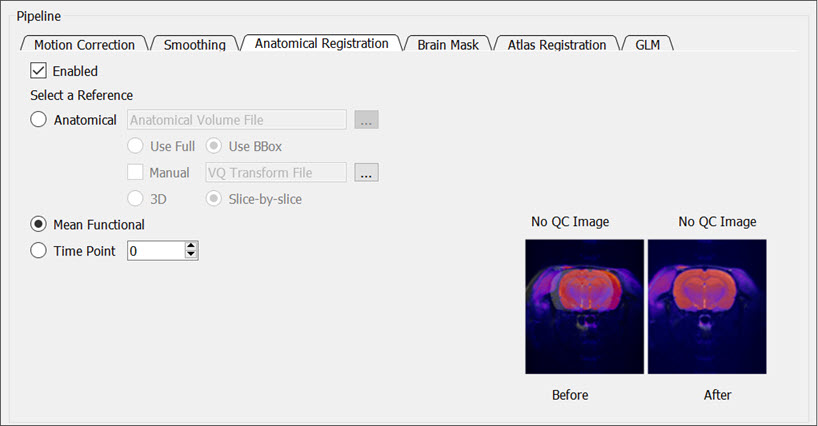
You can choose from the following references:
- Anatomical: Register to a reference anatomical data set. Click on the ellipsis button
 to locate the locally stored anatomical file. You can either provide a manual transformation or perform an automatic registration. For the automated registration, you can choose to use the entire field of view (Use Full) or only the brain (Use BBox). The Use BBox setting uses a bounding box around the brain to limit what is used for registration. If the manual box is checked, provide a locally stored XML transformation for the registration of the functional to the reference anatomical.
 - Mean Functional: Register to the mean of the functional time series.
- Time Point: Register to a single time point. Either type a specific time point in the box or use the up and down arrows to edit the time point.
If Keep Data Steps is checked in the Output section, then the registered data will be stored to the output directory with suffix -anatreg. Similarly, if the Save QC box is checked, then before and after registration QC images will be stored to the output directory as well as displayed under the Anatomical Registration tab. Since the mean of the registered functional will be used for the QC images, no QC images will be stored if the mean functional is used as the reference.
Brain Mask
The Brain Mask tab provides options for skull stripping the input data.
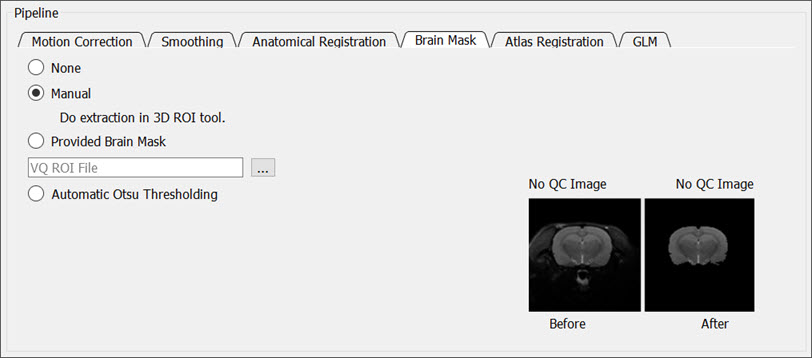
You can choose from the following masking options:
- None: Does not perform any brain masking.
- Manual: Pauses the processing and prompts you to manually segment the brain in the 3D ROI tool using automatic spline tool thresholding.
- Provided: You must provide brain segmentation (RMHA file).
- Automatic: Performs an Otsu thresholding on the brain.
If Keep Data Steps is checked in the Output section, then the masked data will be stored to the output directory with suffix -masked. Similarly, if the Save QC box is checked, then before and after masking QC images will be stored to the output directory as well as displayed under the Brain Mask tab.
Atlas Registration
Check the Enabled box to co-register the input data to an atlas.
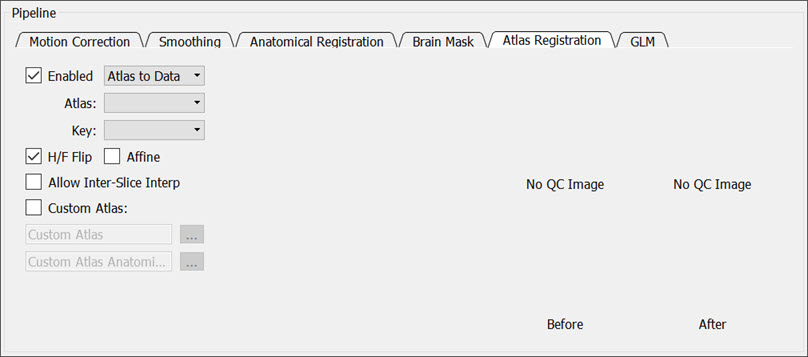
You can customize the atlas registration by adjusting the following settings:
- Data to Atlas/Atlas to Data: registers the atlas to the data or vice versa.
- Atlas: Populates with the correct provided atlas based on the header information from the loaded data set.
- Key: performs hemisphere (Left/Right) or whole brain analysis using all regions in the provided atlas or using a mapping of all regions to a smaller number of larger regions.
- H/F Flip: Check this box to flip the data (or atlas) in the head/foot direction before registration.
- Affine: allows the tool to scale and shear the data (or atlas) during registration, if necessary.
- Allow Inter-Slice Interp: allows the tool to interpolate the data (or atlas) between slices.
- Custom Atlas: provides custom atlas RMHA and anatomical files.
If Keep Data Steps is checked in the Output section of the tool, then the registered data will be stored to the output directory with suffix -atlasreg. Similarly, if the Save QC box is checked, then before and after atlas registration QC images will be stored to the output directory as well as displayed under the atlas registration tab.
General Linear Modeling
Check the Enable box to perform modeling analysis. Choose from pre-defined Ramp, Bolus, Boxcar, or Region ideal functions or import a custom design.
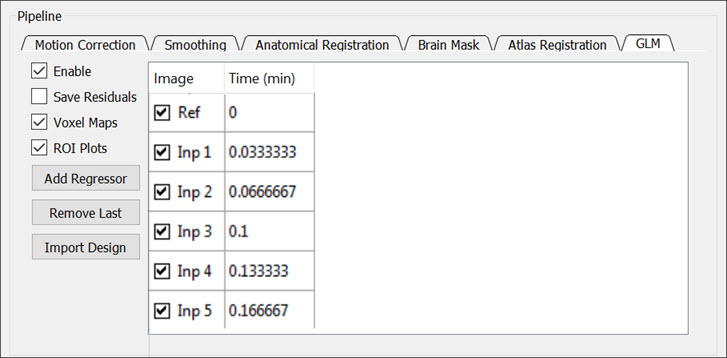
You can customize the analysis and output materials with the following settings:
- Save Residuals: saves a map of the residuals to the output folder. The name of the map will be
residuals. - Voxel Maps: saves parameter maps for the chosen regressors. These files will be stores with suffix
-paramMap. - ROI Plots: stores all ROI plots in a folder within the specified output folder. The name of this folder will be
plots. - Add Regressor: adds a regressor to the design matrix. A window will appear from which you can select an available regressor from the drop down menu.
- Each ideal function can be customized for the specific study paradigm. For example, the
Bolusoption allows you to set the shape and center (both in units of TR).
- Each ideal function can be customized for the specific study paradigm. For example, the
- Remove Last: removes the last regressor column of the design matrix.
- Import Design: loads a custom design matrix that is stored locally in
CSVformat.
Run the Tool
Click on the Run button at the bottom of the window to run the tool. If the tool pauses due to a missing settings field, click on the Continue button to resume processing. To close the tool window, click Close.
The progress bar on the bottom left corner displays the progress for each step of the pipeline, including loading the dataset. The total processing time is displayed next to the progress bar once the analysis is complete. A description of what process the tool is working on is also displayed.