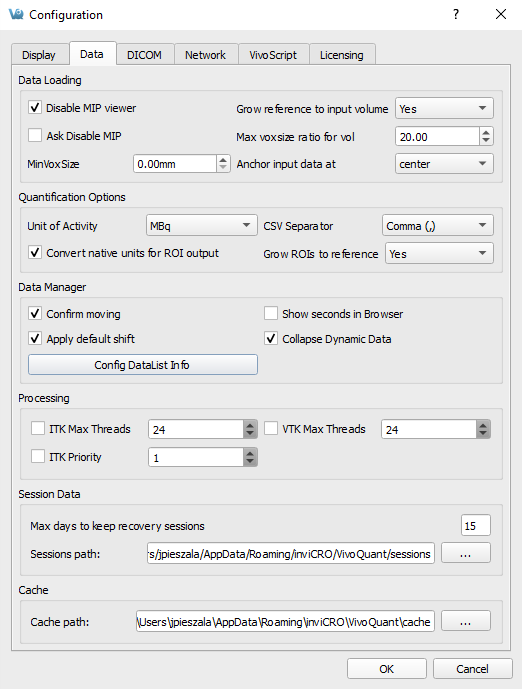
The Data panel contains options for data handling, including data loading, quantification, management and processing.

Data Loading
Use the Data Loading panel to set loading options.
| Option | Description |
|---|---|
| Disable MIP viewer | Check the box to disable the MIP viewer upon loading. For large datasets, this can improve the loading speed. |
| Ask Disable MIP | If enabled, VivoQuant will ask for your permission to initialize the MIP viewer upon loading. For large datasets, this can improve the loading speed. |
| Grow reference to input volume | Choose ‘yes’ to allow the addition of zero-padding to a reference image for it to match the volume of an input image, or ‘no’ to keep the reference image size static (and potentially crop the input image if it is larger than the reference). Choose ‘ask’ to allow a window to appear upon loading, in an input, a data set that is larger than the image in the reference position. |
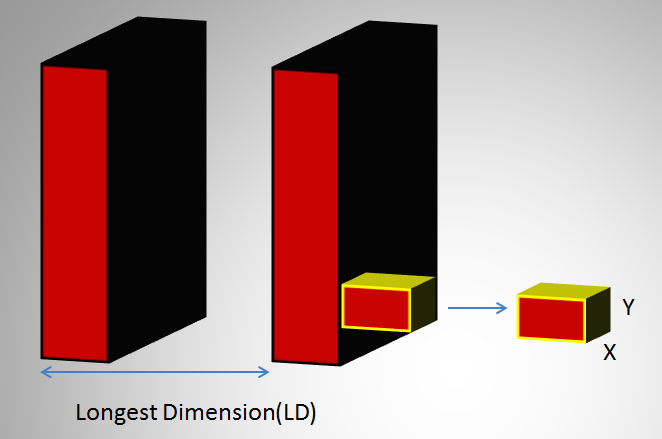
| Max voxsize ratio for vol. | Specify the maximum pixel ratio (largest pixel dimension / smallest pixel dimension) by which a data set is interpolated as a volume image file. |
| MinVoxSize | Specify the minimum allowed voxel width. Data will be resampled upon loading if their voxel width is less than the specified minimum. The voxel width will be doubled until it exceeds the minimum. |
| Anchor input data | Specify where to anchor the input data. Data can be anchored at the following options: center, head, or foot. |

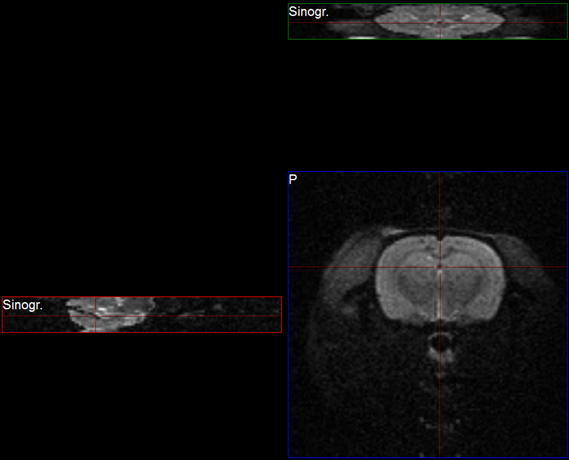
In the above image, LD represents the out-of-plane resolution and the X and Y represent the in-plane resolution. If the pixel ratio of the loaded image exceeds the given threshold, i.e. MaxVoxSizeRatio < LD/X, the data set will be loaded as a planar 2D by n file. Below is an example MR image loaded as a planar 2D by n file.

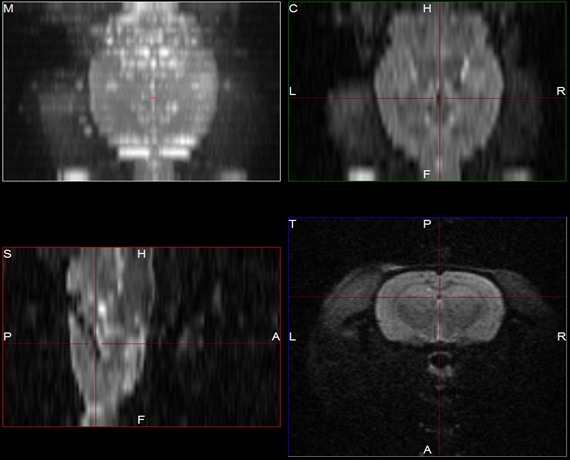
If the pixel ratio of the loaded image is less than the given threshold, i.e. MaxVoxSizeRatio > LD/X, the data set will be loaded as an interpolated volume image with isotropic voxels. Below is an example MR image loaded as an interpolated volume file.

As described on the Open DICOM Data help page:
- If the ‘Force Planar’ check box is checked in the Data Browser, then the image will load in planar mode regardless of the value set for MaxVoxSizeRatio.
- If the ‘Force Planar’ check box is unchecked in the Data Browser, then the image will load in the appropriate mode according to the value set for MaxVoxSizeRatio.
Quantification Options
Use the Quantification Options panel to set options used by the Projection++ Operator and the 3D ROI Operator.
| Option | Description |
|---|---|
| Units of Activity | Select the unit to be used for quantifying both PET and SPECT data. Options include MBq, kBq, mCi, and µCi. Note: Concentration units (e.g. nCi/cc) will not be converted to the unit of activity specified. The Multi-Atlas Segmentation and 3D Brain Atlas Tool plugin modules do support converting from concentration units to units of µCi. |
| CSV Separator | Choose the CSV file delimiter of their choice, applied when saving Quantification data. |
| Convert native units for ROI output | Enable this option if would like ROI output operations to attempt to convert your data to the unit specified in the Units of Activity drop down box mentioned above. |
| Grow ROIs to reference | Choose if the ROI object should be resampled when the dimensions and or voxel sizes of the reference image are changed. - Ask (a prompt will be displayed to ask for the desired behavior) - Yes (ROIs will be resampled to match the reference’s dimension) - No (ROIs will be embedded into an object matching the reference’s dimension) |
| Quant. Table Items | Available here on MacOS only. See the Projection++ Operator and 3D ROI Operator sections for other Operating Systems. |
Data Manager
The Data Manager panel contains options for handling data.
| Option | Description |
|---|---|
| confirm moving | Check to enable a confirmation message when rearranging data in the Data Manager. |
| Show seconds in Browser | Check to display the seconds in the study date column in the DICOM browser. VQ has to be restarted to configure this change. |
| Apply default shift | Check to apply a default reorientation to data being loaded into VQ. The default shift can be defined in the Reorientation/Registration operator. For more on this, please see the Reorientation/Registration page. |
| Collapse Dynamic Data | If enabled, dynamic frames from the same series will be loaded into the data manager as a single input. If disabled, each dynamic frame will be loaded into the data manager as a separate input. Regardless of the setting, the data manager allows you to manually expand collapsed dynamic data, or collapse a set of dynamic frames into a single input. |
| Config DataList Info | This button will launch the Data Manager Text Configuration dialog; within which, you will be able to customize what meta data is shown listed for your data sources in the Data Manager. |
Processing
Use the Processing Panel to set resource limits on data processing.
| Option | Description |
|---|---|
| ITK Max Threads | If enabled, you can customize the number of threads used by ITK at runtime. If disabled, ITK thread number will be set to its default value. |
| VTK Max Threads | If enabled, you can customize the number of threads used by VTK at runtime. If disabled, VTK thread number will be set to its default value. |
| ITK Priority | If enabled, you can customize ITK thread priority. If disabled, ITK thread priority will be set to its default value. |
Session data
VivoQuant may at times save a local backup of the current session state so that users can recover their session data. The behavior of the recovery session mechanism can be controlled in the Session data panel.
| Option | Description |
|---|---|
| Max days to keep recovery sessions | Recovery sessions older than the set days will be deleted on startup. |
Cache
Vivoquant allows users to have more control over system resources by allowing the user to adjust the location of the VQ cache.
| Option | Description |
|---|---|
| Cache Path | Various VQ utilities will be using this location in support of computations and data handling. |