VivoQuant has two Bed Removal modes, Classic and Advanced.
Getting there
The bed removal tools can be accessed by going to the Advanced Modules > Bed Removal menu.
Classic bed removal
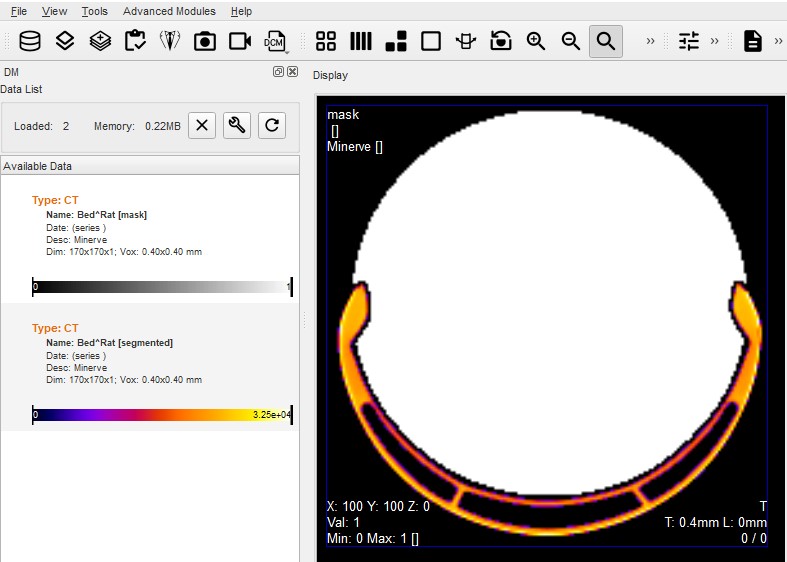
In this mode, bed removal is carried out on CT modality images only. Two species are supported, mouse and rat. If we detect that animal is supine we will reorient the mask image to an optimum position using a correlation between the mask and the image. If the animal position could not be found in the image metadata, it is assumed not to be supine.
If the animal species information is not present in the image metadata, the user will be prompted to choose between a rat or mouse bed. If the animal size is ‘large’, a rat bed will be selected as it is expected to give a more accurate result.
By default classic uses pre installed Minerva bed files in your applications running directory:
| File | Purpose |
|---|---|
| bed-minerve-mouse-mask.bin | Acts a mask for the Minerva bed in the case of a mouse |
| bed-minerve-mouse-segmented.bin | Acts a mask for the mouse itself |
| bed-minerve-rat-mask.bin | Acts a mask for the Minerva bed in the case of a rat |
| bed-minerve-rat-segmented.bin | Acts a mask for the rat itself |
Advanced bed removal
The advanced bed removal tool allows for more fine-grained control over the bed removal process. To start, the user will want to create an ROI to be used as a mask for the bed removal. This ROI mask should cover all areas of the bed and avoid any subject area. Once your mask is prepared you enter it into the bed removal tool by using the button Export ROIs into the Bed Removal Tool
The tool will make all ROIs saved into the bedremoval folder next to the cache available for ROI masks. Then, the user should work their way down the page and fill settings as appropriate before clicking Process to carry out the bed removal as configured.
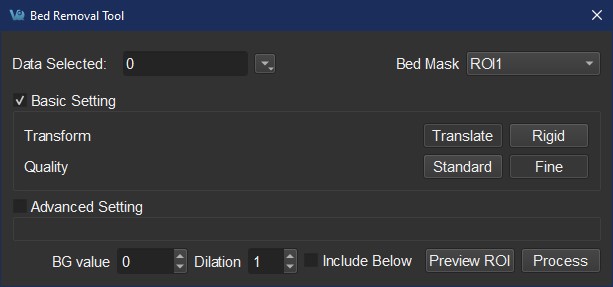
Basic settings
-
Transform: choose either
Translatefor an XYZ transform, orRigidto optionally allow the transform to include rotations. -
Quality: choose
Standardfor a faster calculation, orFinefor a more accurate but slower calculation.
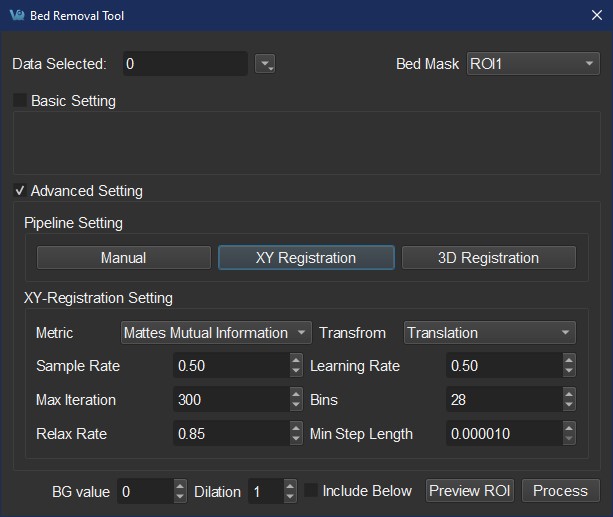
Advanced settings
-
Manual: Initially register the bed image/mask so that automated registrations line up better.
-
2D Registration: Run an automated registration on one or more planes. Settings include the metric, transform, sample rate, learning rate, max iteration, bins, relax rate and minimum step length.
-
3D Registration: Similar to 2D registration, but align along all three axes at once.
Common settings
-
Data selected - select one or more loaded images to apply bed removal.
-
Bed mask - the user can place .mhd image files representing a mask in a
bedremovaldirectory next to the VivoQuant cache folder. Any images found there will be available in this pulldown.
-
BG - value that represents the background of the image.
-
Dilation - dilation value to apply to the bed ROI after the first pass of the algorithm.
-
Include below - enable this option to include image pixels ‘away’ from the animal as part of the bed mask.
Preview ROI
Clicking the Preview ROI button will register the mask to the bed without removing it, allowing for QC. It is recommended you do this for one or two subjects to make sure the bed mask and tool settings will work well for your project.