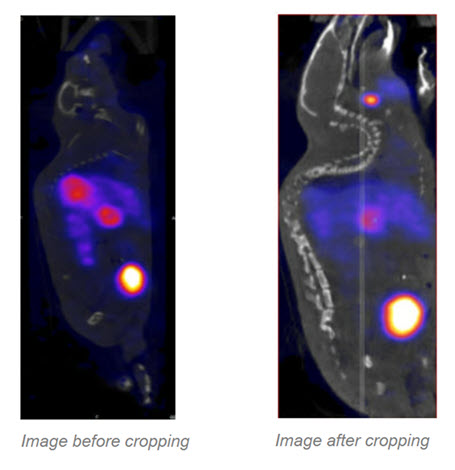
The Cropping Tool allows images to be made smaller by removing any unwanted areas. For example, if an image has been cut, then the cropping function can be used to trim away the blank areas of the image.
Getting There
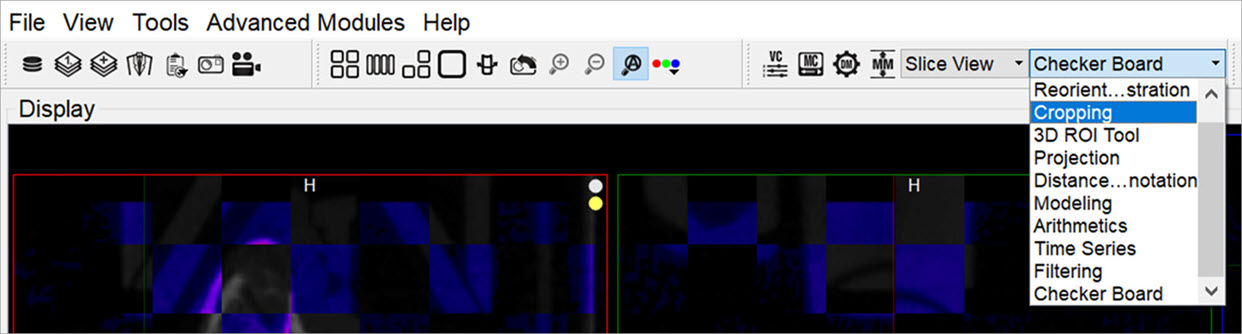
The Cropping tool can be accessed via the tool pull-down menu on VivoQuant’s front panel.
Using the Tool
Upon selecting the Cropping tool, the standard view options disappear and red sliders are displayed in their place.
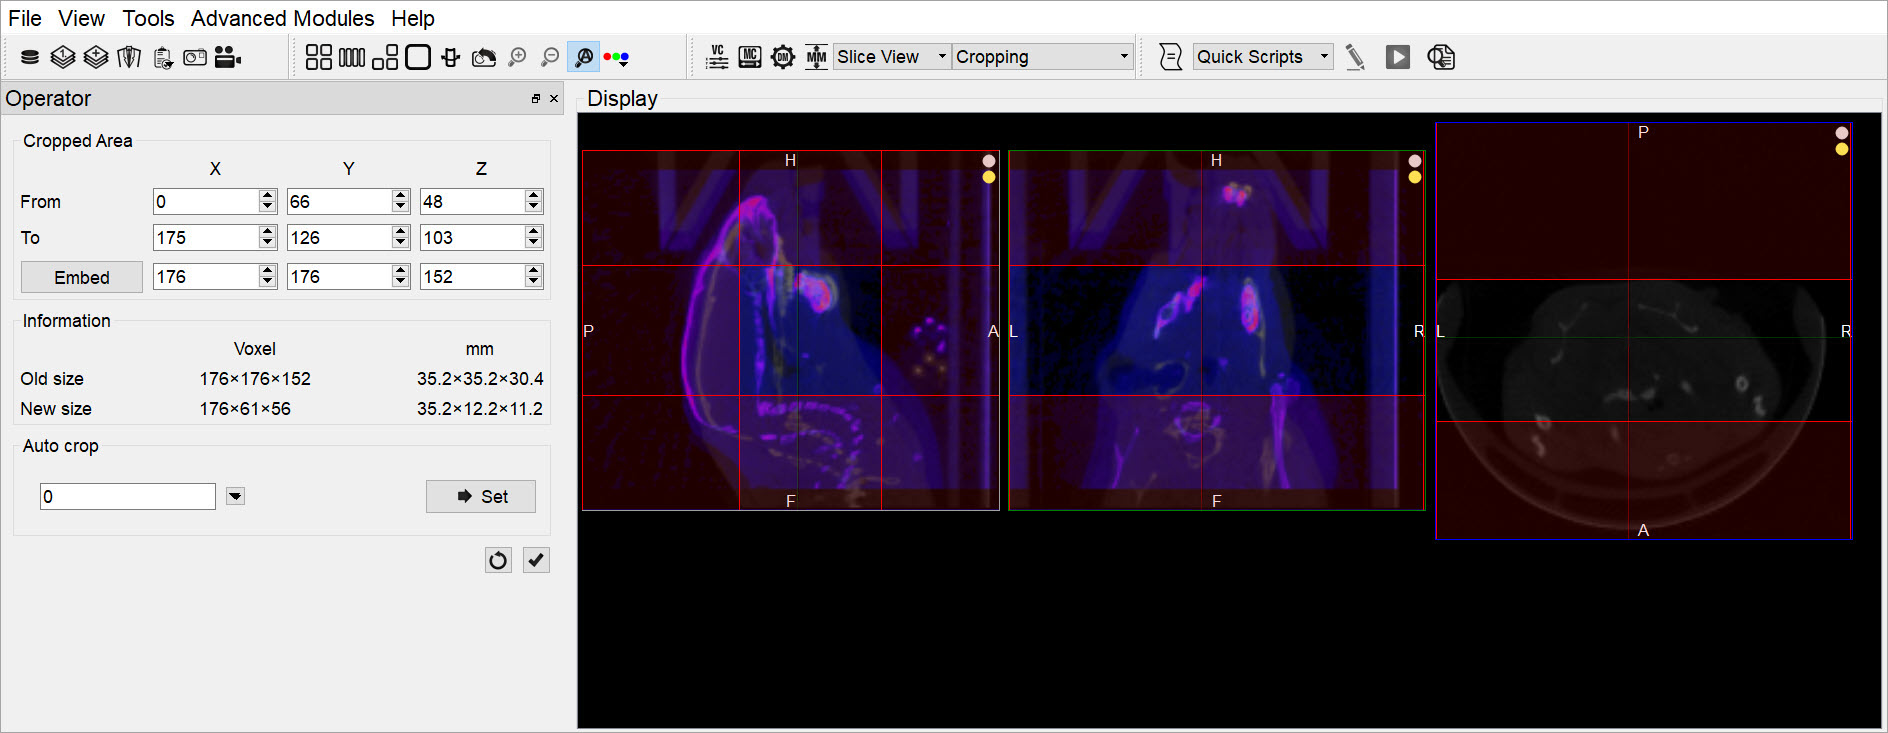
Two red sliders appear for each view direction (i.e., coronal, sagittal, and transversal). The red sliders may be moved using the mouse (click and hold on a slider and then move the mouse to move the slider) or by using the arrow keys in the cropping dialog. Manipulation of the red sliders creates a three-dimensional rectangular cropping volume. The current voxel position of the red sliders is displayed in the Cropped Area section of the operator window.
To apply the crop, once the red sliders are in the desired positions, click the Crop button ![]() .
.
To reset the crop range sliders to their original positions, click the Refresh button ![]() .
.
The Cropping dialog provides information about the pixel location of each red slider (x, y, z), and current and cropped image size information in both voxels and mm. The embed function will pad background slices to increase the dimensions of the image. The auto-crop feature starts its search at the end slices of the image and adjusts the sliders towards the center of the image until a non-background voxel is detected from all 6 faces.