The Data Manager presents information about the datasets loaded into VivoQuant. While VivoQuant only displays up to three datasets in the Display at a time, post-processing operations may be performed on any number of datasets in the Data Manager. The only limiting factor in the number of simultaneously loaded dataset is the system memory.
Getting There
There are three methods to open this tool. The first method is using the Data Manager thumbnail ![]() in the Main Window.
in the Main Window.
The second method is to go to Data Manager under the Tools menu.
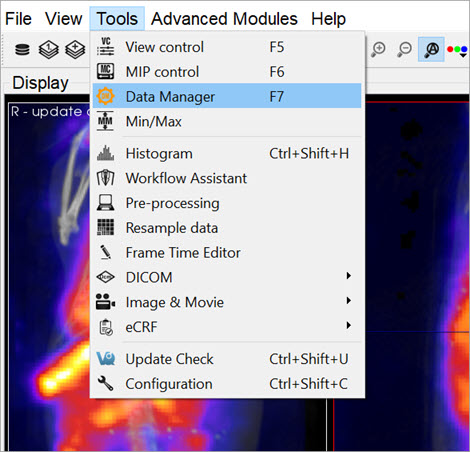
Finally, the Data Manager is also available by using the keyboard shortcut F7.
Using the Data Manager
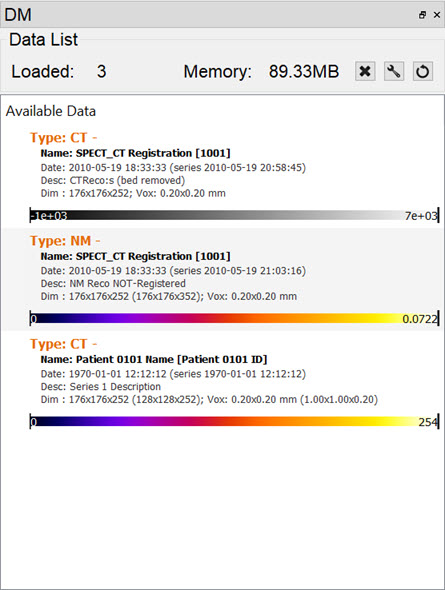
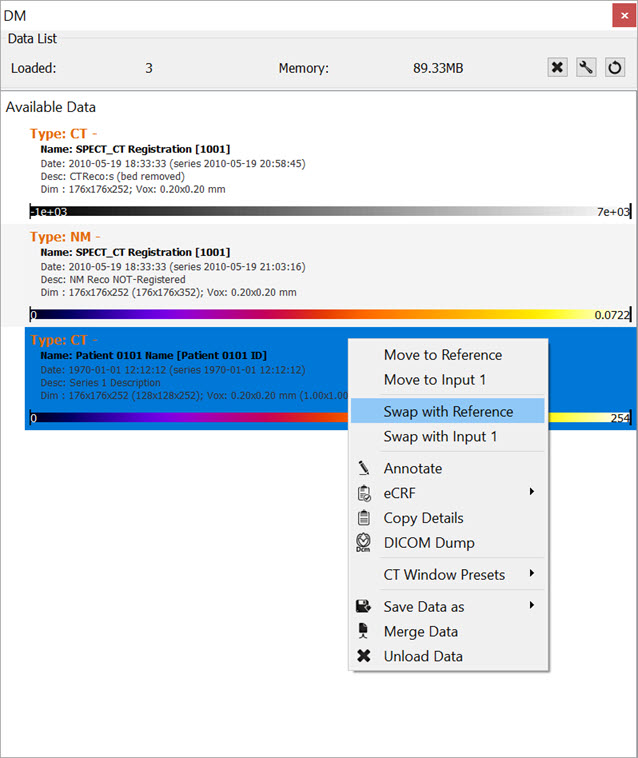
The Data Manager displays a list of all datasets loaded into VivoQuant, along with information about each of them. This tool can hold as many datasets as the system memory allows; however, the first, second and third datasets in the Data Manager are the only three that appear in the Display. These datasets are the Reference, Input 1, and Input 2, respectively.
The information displayed by the Data Manager includes the image type, name, dimensions and voxel size. For DICOM data, the Study Date, Series Date, and Series Description will also be included when available.
Below this information is a color bar specific to each dataset. The color bar defines the colors that will be used to represent the dataset in the Display. The colors can be changed by right-clicking the color bar and selecting the desired color palette. VivoQuant selects color palettes for datasets by default based on modality (CT, PT, MR, etc.). Default color palette options may be changed in the Display tab of the Configuration window. These changes do not affect the minimum and maximum values stored in the Min/Max Tool. For more information on changing the minimum and maximum values, see the Min/Max Tool page.
If the windowing is using the Min/Max option, the palette can be adjusted by clicking on the black bars at the far left or right of the palette to adjust the window min or max, respectively. If the windowing is using the Level/Width option, the width of the window is adjusted by clicking and dragging the ends, while the center is adjusted by clicking and dragging the middle of the palette display. The Level/Width palette can be also adjusted similarly to the Min/Max by holding the Shift key while dragging the ends.
The windowing can be adjusted within the image as well, by holding a right-click and dragging the mouse. In the Min/Max setting, dragging left/right will adjust the min while up/down will adjust the max. In the Level/Width setting, dragging left/right will adjust the level, while up/down will adjust the width. This function works within any of the operators and does not require that the Data Manager is active.
The color palettes for a single frame of data can be edited in the Data Manager by right-clicking on the color palette.
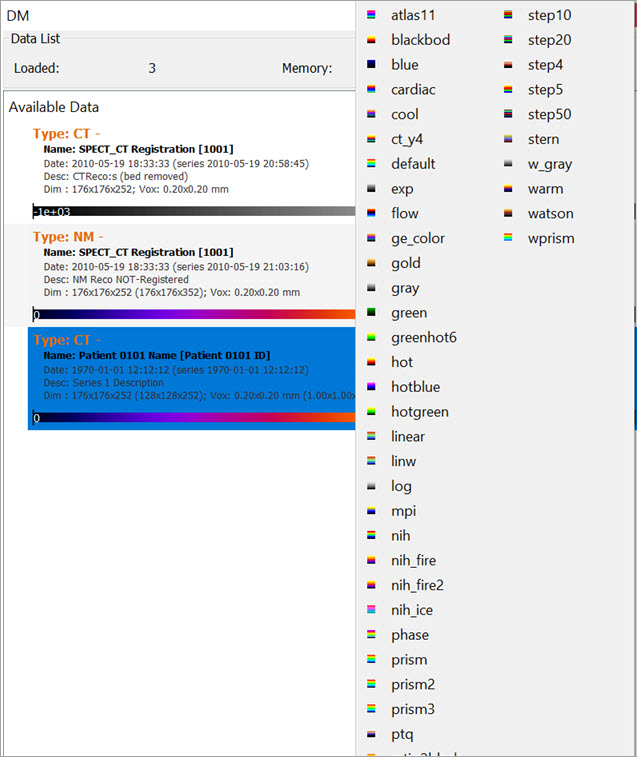
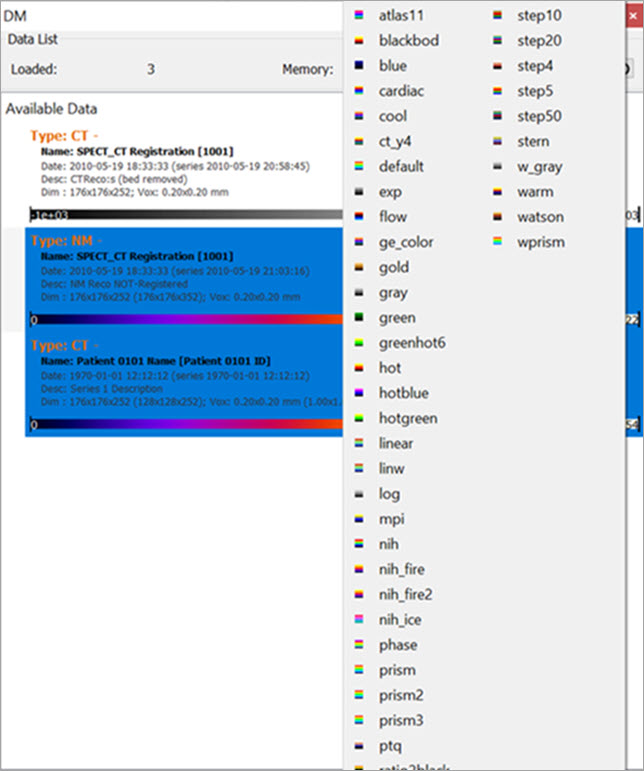
To edit multiple frames at once, use Ctrl or Shift to select multiple frames, then right-click on one of the palettes, and all frames will be edited together. This technique can also be used for editing the Min/Max for the palettes of multiple frames at once.
Ordering Data
Data may be rearranged into any order in the Data Manager by dragging a dataset and dropping it to the desired position. Alternatively, data can be moved into the Reference, Input 1 or Input 2 location by right-clicking and selecting Move to Reference/Input 1/Input 2.

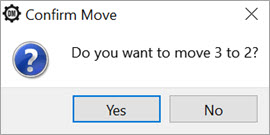
A prompt will appear confirming the move. Click OK to complete the move.
A dataset can also be quickly swapped with the dataset in the Reference, Input 1, or Input 2 positions by right-clicking on a dataset and selecting Swap with Reference /Input 1 /Input 2 .
Options
Right clicking on a dataset brings up a menu with several data manipulation options.
| Option | Description |
|---|---|
| Move to Reference/Input 1/Input 2 | Moves the selected data set to either the Reference/Input 1/Input 2. |
| Annotate | Allows an annotation to be added to the data details. |
| Copy Details | Copies data set details to the clipboard, from where they may be pasted into other files. |
| DICOM Dump | Opens the DICOM header information for the selected data sets. |
| Save Data as | Allows data to be saved as DICOM, TRaster, Raw, 4D or ITK image file. |
| Merge Data | Merges two or more selected data sets into one. |
| Unload Data | Unloads data from VivoQuant. |
More Information
Many of the functions in VivoQuant are directed to specific images loaded in the Data Manager, so it is important to pay attention to the order in which data has been loaded into it.
See How To Make a Dynamic Movie for a practical example that makes use of the Data Manager.