Overview
The Multi-Atlas Segmentation Tool generates ROIs by registering a series of images in a Reference Library to the image that has been loaded in the Data Manager. The Reference Images must each have a corresponding ROI. The tool registers the images in the Reference Library to the loaded data, and applies the same transformation to the corresponding ROI. The tool then works on a voxel-by-voxel basis, classifying a voxel to the new ROI if a greater percentage of the reference sets classified that voxel as within the ROI than the threshold percentage set by the user. Important factors that influence performance include image contrast, animal positioning consistency, and the size of the reference library.
Getting There
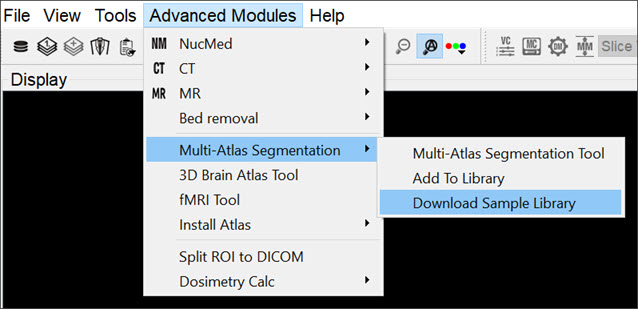
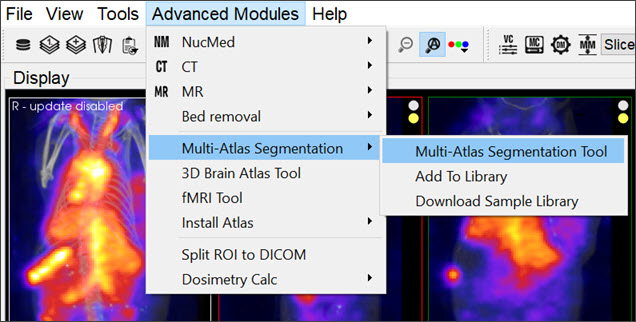
You can access the Multi-Atlas Segmentation Tool by navigating to Advanced Modules -> Multi-Atlas Segmentation. Here, there are three options: Multi-Atlas Segmentation, Add to Library, and Download Sample Library.
Adding to Reference Library
The Reference Library is the basis of the efficacy of the Multi-Atlas Segmentation Tool. The Reference Library is stored locally, and is built in one data set at a time.
The first step in adding a data set to the Reference Library is to open the data and ROI. In order to add to the Library, there must be an active ROI in the 3D ROI Tool. There can be multiple ROIs, but it is important, when building the Reference Library, to keep the naming of ROIs consistent; that is, if the organ of interest is the left kidney, always call it exactly Left Kidney, otherwise, it will not be recognized as all the same organ (however, capitalization does not have an affect).
With the data and ROI loaded simply navigate to and click Add to Library as described above. The GUI will appear.
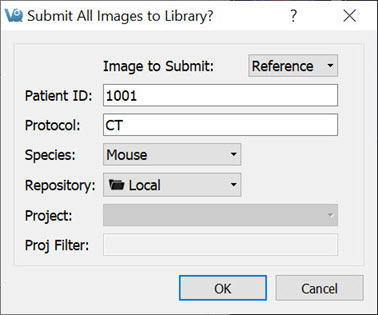
The GUI offers four editable fields:
| Image to Submit | This option allows you to select which of the loaded images to submit to the Reference Library. |
| Patient ID | The Patient ID can be anything that is unique and will help you identify this data set when selecting which scans to use from your Reference Library. |
| Protocol | The Protocol should include information as to how the image was acquired, the field of view, modality, etc. This will be used as a filter to determine which scans from the Reference Library will be used by the tool. |
| Species | The Species dropdown list contains frequently imaged species. If you wish to have additions made to the options provided please contact your Account Manager or support@invicro.com. |
Segmenting With The Tool
With the image on which the new ROI is to be drawn loaded in the Data Manager, open the Multi-Atlas Segmentation Tool. You can apply the segmentation settings and perform other tasks from the tool’s GUI.
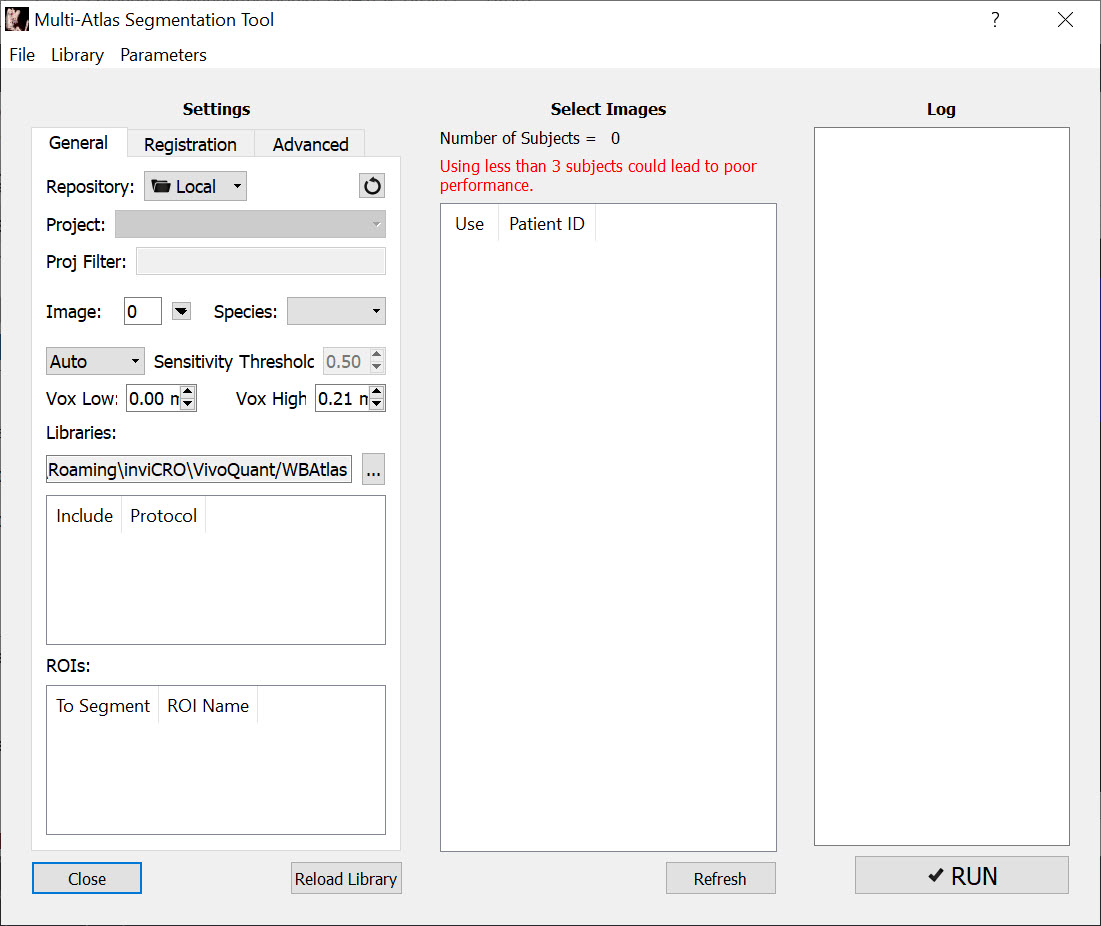
Settings
The tool relies on the settings you select. There are two levels of settings, the Basic Settings, explained below, and the Advanced Settings, which should not need to be modified.
Basic Settings
The Basic Settings tab contains most of the settings that will need to be changed. Here, you can select the appropriate Reference Images, the appropriate Test Image, ROIs to segment, and Probability Threshold to use.
Reference List Selection
Selecting the proper Reference scan is imperative to the proper functionality of the tool. The settings you select that factor into the images used are outlined in the table below:
| Image | The image in the Data Manager that will be the basis of the ROIs generated. |
| Species | The species of the animal being segmented. This is based on the available options in the Reference Library. |
| Voxel Size | The Low and High parameters for the voxel size of the Reference Images available. The default low is 0.00mm and the default high is the voxel size of the data loaded. Using Reference Data with a lower resolution than the data that has been loaded will compromise the quality of the Reference ROI. |
| Protocols | A list displaying the protocols present in the Reference Library. Changing the protocols included will narrow the Reference List. Only include Reference Images with the same protocol as the image loaded in the Data Manager. |
| ROIs | A list displaying the possible ROIs to generate based on those present in the Reference Library. Only those selected will be generated by the Tool. |
Other Basic Settings
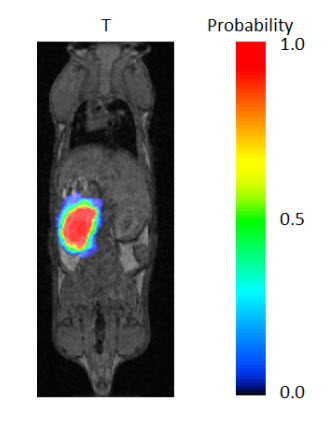
You can also edit the Probability Threshold. Following the registration of each Reference Image to the image in the Data Manager, each voxel is assigned a probability that it belongs in the ROI. Only voxels with a probability greater than the threshold you set will be mapped to the ROI. The default for this setting is 0.5; and, typically, the ROI will become larger as the threshold is lowered.
Select Images
The middle pane of the GUI allows you to select which images to use for the final Reference List. These should already have been narrowed down by your previous selections in the Settings pane. It is up to you how many Reference Images to use. However, the time the tool takes to run is largely influenced by how many Reference Images are selected.
Run Tool and View Log
Once the Settings and the Reference Images have been selected, click Run in the lower right corner of the GUI to run the tool. The Log outlines the steps taken by the tool. At its completion, the tool remains open, but VivoQuant navigates to the 3D ROI Tool, where the new ROIs can be viewed and modified.
Downloading Sample Library
A sample Reference Library is available depending on the VivoQuant license. This option is used for testing and learning how to operate the tool. To download it, navigate to Advanced Modules->Multi-Atlas Segmentation->Download Sample Library.