You can load, view, analyze and save Autoradiography data using the same tools VivoQuant uses for in vivo image data. Once loaded into VivoQuant, data can be reoriented, cropped, rescaled, and quantified.
The Autoradiography Calibration tool allows you to calibrate autoradiography data based on known calibration standards in the image.
Getting There
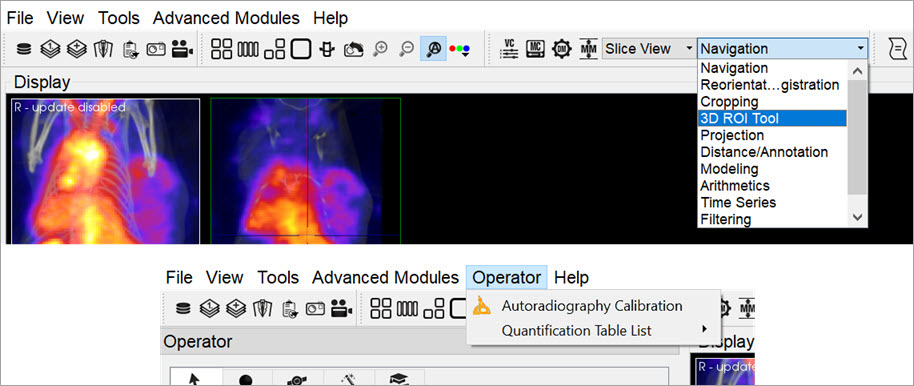
To access the tool, activate to the 3D ROI Tool operator, then go to the Operator tab in the main menu and select Autoradiography Calibration.
Function
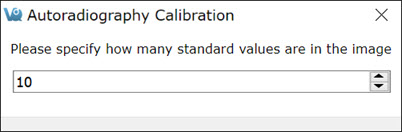
Once the you start the tool, it asks several questions to establish how it will be used. The first prompt asks for the number of calibration standards being used. This determines the number of ROIs that populate the 3D ROI Tool.
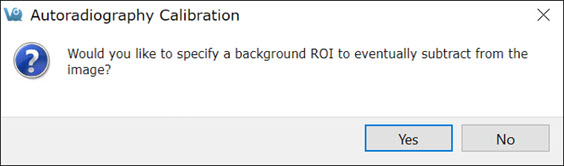
The second prompt asks if there will be a background ROI used. This influences the calibration curve. In most cases, a background ROI is recommended.
The ROIs are populated based on the answers to these questions. You then need manually place them in the correct locations in the image. Use the 3D Paint Mode tools to perform this task. Regions should appear similar to the image below.
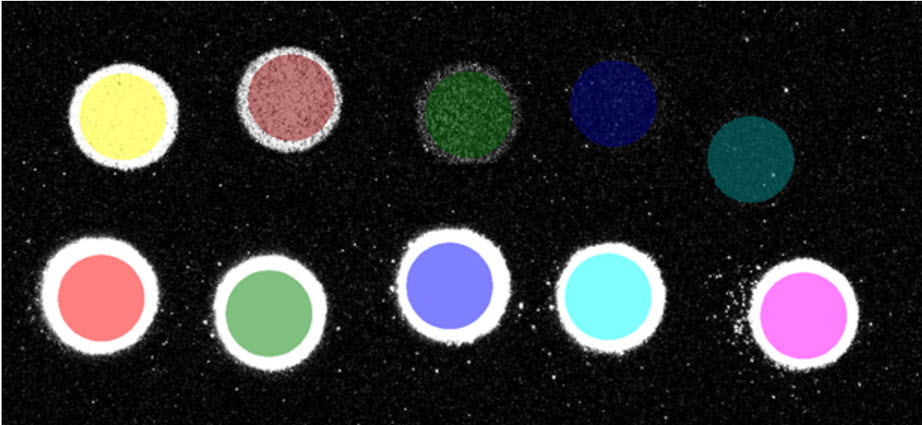
Image Calibration
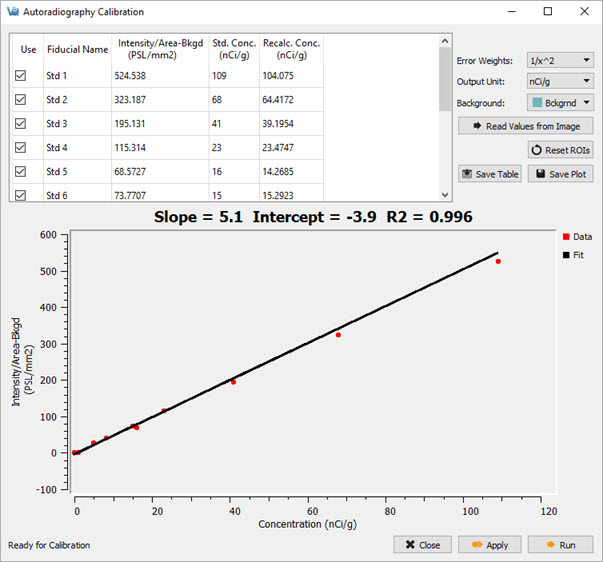
After segmenting the calibration standards, click Read Values from Image. The table displays the mean value of each region. Provide the true value of each standard as well as the correct output unit. Also, choose from the available Error Weight techniques.
After you have established the settings, click Run. The plot populates with the values of the standards and provided values along with the calculated fit line. Changing the settings, particularly the Error Weights, will change the output calibration curve.
To see how the curve changes with different settings, change them and click Run. Once the curve fits as desired, click Apply to apply the calibration to the data.